
Table of Contents
This article discusses how to create a simple mobile application using Flutter. The basic thing when creating a mobile application using flutter is considered a widget. That means any mobile application is made up of a collection of widgets. Let us first consider what a widget is.
What is a widget in Flutter?
Simply, a widget is a simple component. That means a mobile app is made up of a number of small widgets. For example button, text field, Text, Radio button, …, etc. The Flutter framework contains a large number of previously created widgets. Using them we have the ability to create beautiful mobile, web, or desktop applications. In addition, we have the ability to create our own widgets.
Let’s make our first flutter mobile application. Here you can use any of the IDEs of Android Studio or VS Code. How to configure these IDE is discussed in the previous article. If you have not read it, you can get it by clicking here. Here we use VS code editor.
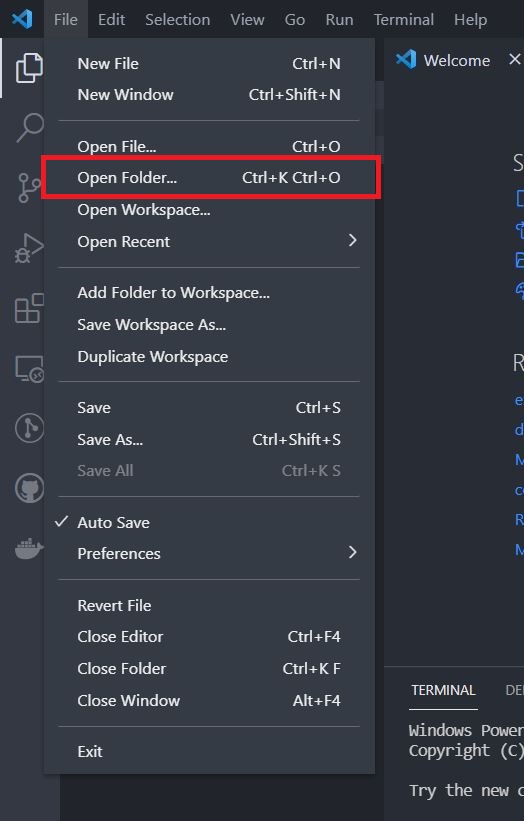
Let’s open VS code editor and go to File> Open Folder…(Ctrl+K+Ctrl+O). Then select any folder on your hard drive. for the demonstration, I created a folder called “Flutter Demo App”. then select the folder and click the “Select Folder” button.
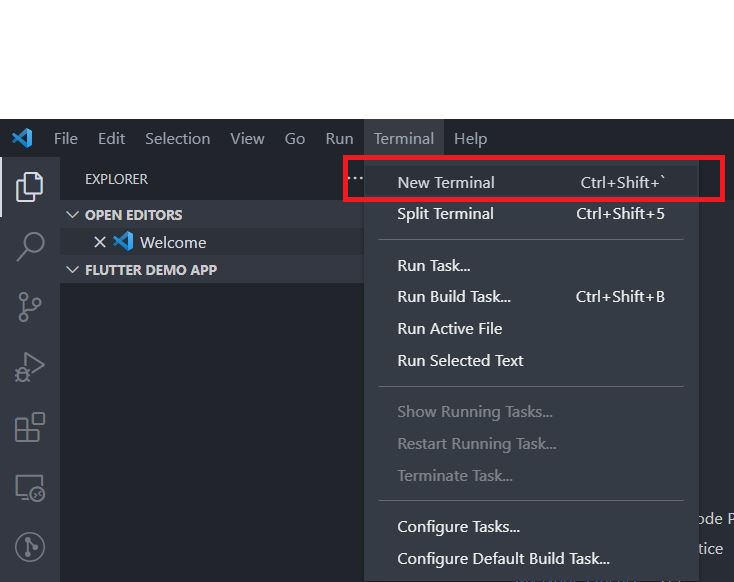
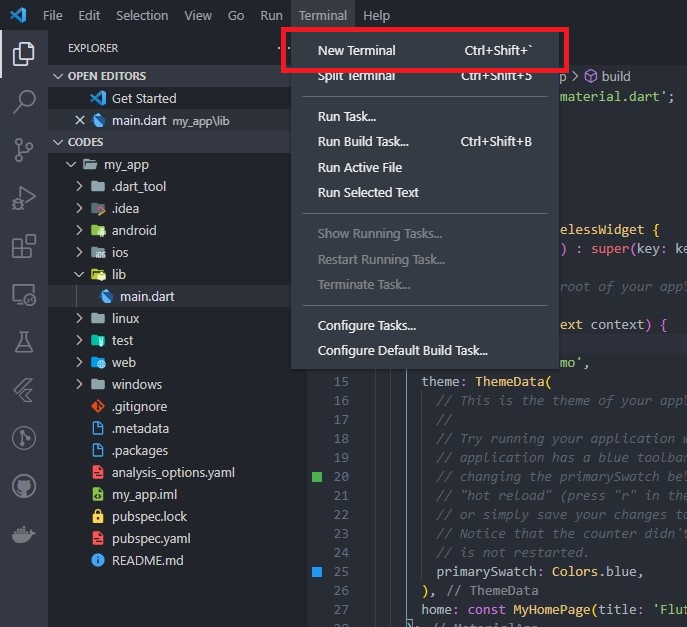
Next, go to the terminal and click “New terminal”.
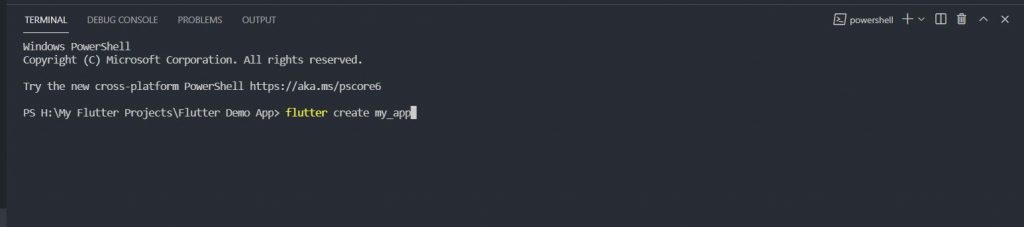
Now, type flutter create my_app in a terminal window. you can give any name for my_app.
Now you can see there are a lot of files in the Explorer window.
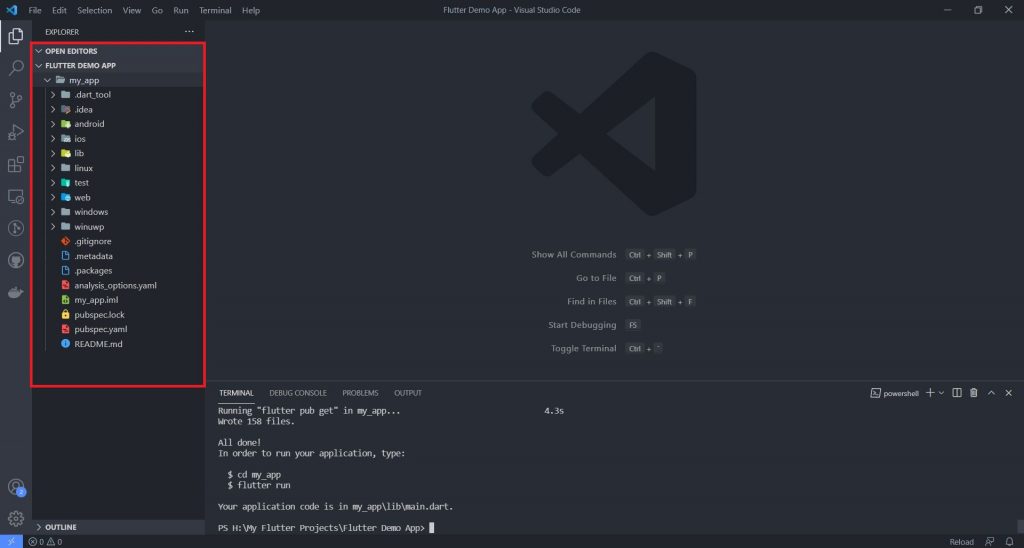
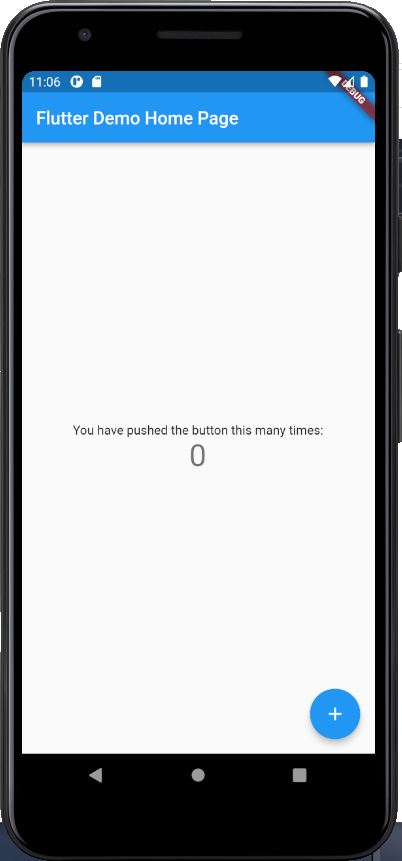
your all codes are written under the main.dart file(inside the lib folder). inside the main.dart file, you can see the pre-build flutter counter application.
import 'package:flutter/material.dart';

void main() {
  runApp(const MyApp());
}

class MyApp extends StatelessWidget {
  const MyApp({Key? key}) : super(key: key);

  // This widget is the root of your application.
  @override
  Widget build(BuildContext context) {
    return MaterialApp(
      title: 'Flutter Demo',
      theme: ThemeData(
        // This is the theme of your application.
        //
        // Try running your application with "flutter run". You'll see the
        // application has a blue toolbar. Then, without quitting the app, try
        // changing the primarySwatch below to Colors.green and then invoke
        // "hot reload" (press "r" in the console where you ran "flutter run",
        // or simply save your changes to "hot reload" in a Flutter IDE).
        // Notice that the counter didn't reset back to zero; the application
        // is not restarted.
        primarySwatch: Colors.blue,
      ),
      home: const MyHomePage(title: 'Flutter Demo Home Page'),
    );
  }
}

class MyHomePage extends StatefulWidget {
  const MyHomePage({Key? key, required this.title}) : super(key: key);

  // This widget is the home page of your application. It is stateful, meaning
  // that it has a State object (defined below) that contains fields that affect
  // how it looks.

  // This class is the configuration for the state. It holds the values (in this
  // case the title) provided by the parent (in this case the App widget) and
  // used by the build method of the State. Fields in a Widget subclass are
  // always marked "final".

  final String title;

  @override
  State<MyHomePage> createState() => _MyHomePageState();
}

class _MyHomePageState extends State<MyHomePage> {
  int _counter = 0;

  void _incrementCounter() {
    setState(() {
      // This call to setState tells the Flutter framework that something has
      // changed in this State, which causes it to rerun the build method below
      // so that the display can reflect the updated values. If we changed
      // _counter without calling setState(), then the build method would not be
      // called again, and so nothing would appear to happen.
      _counter++;
    });
  }

  @override
  Widget build(BuildContext context) {
    // This method is rerun every time setState is called, for instance as done
    // by the _incrementCounter method above.
    //
    // The Flutter framework has been optimized to make rerunning build methods
    // fast, so that you can just rebuild anything that needs updating rather
    // than having to individually change instances of widgets.
    return Scaffold(
      appBar: AppBar(
        // Here we take the value from the MyHomePage object that was created by
        // the App.build method, and use it to set our appbar title.
        title: Text(widget.title),
      ),
      body: Center(
        // Center is a layout widget. It takes a single child and positions it
        // in the middle of the parent.
        child: Column(
          // Column is also a layout widget. It takes a list of children and
          // arranges them vertically. By default, it sizes itself to fit its
          // children horizontally, and tries to be as tall as its parent.
          //
          // Invoke "debug painting" (press "p" in the console, choose the
          // "Toggle Debug Paint" action from the Flutter Inspector in Android
          // Studio, or the "Toggle Debug Paint" command in Visual Studio Code)
          // to see the wireframe for each widget.
          //
          // Column has various properties to control how it sizes itself and
          // how it positions its children. Here we use mainAxisAlignment to
          // center the children vertically; the main axis here is the vertical
          // axis because Columns are vertical (the cross axis would be
          // horizontal).
          mainAxisAlignment: MainAxisAlignment.center,
          children: <Widget>[
            const Text(
              'You have pushed the button this many times:',
            ),
            Text(
              '$_counter',
              style: Theme.of(context).textTheme.headline4,
            ),
          ],
        ),
      ),
      floatingActionButton: FloatingActionButton(
        onPressed: _incrementCounter,
        tooltip: 'Increment',
        child: const Icon(Icons.add),
      ), // This trailing comma makes auto-formatting nicer for build methods.
    );
  }
}
Let’s run the application in an android emulator/iOS simulator or physical device. If you are using a physical device, you have to set up your device properly. If you are using an emulator or simulator, you have to create an emulator/simulator in your machine.
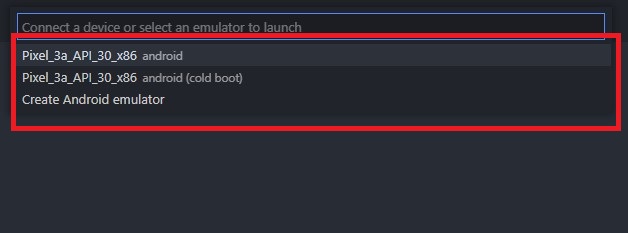
To Launch your preferred emulator, press Ctrl + Shift + P and search for the command Run Android Emulator then press Enter. The list of the available emulators will show up on the screen, just select the one you want.

Now emulator is running in your machine. Next, open new terminal window in vs code. for that press ctrl+shift+` or go to terminal->New terminal.
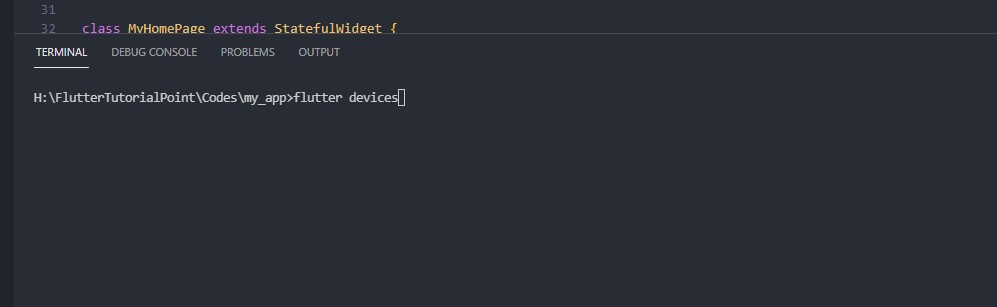
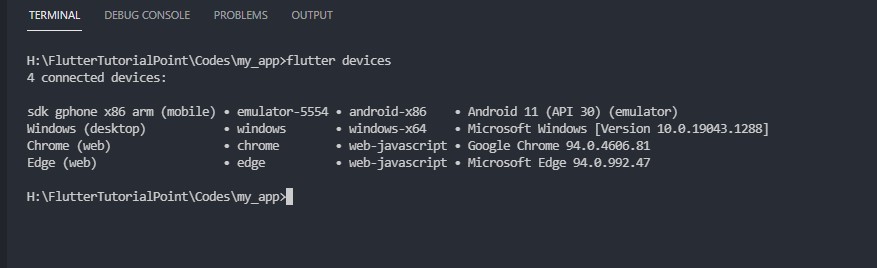
Now type flutter devices in the terminal window and press enter.
Now you will be able to see available flutter devices in your machine.
Go to Run-> Start Debugging or press the F5 key on your keyboard and then your application will be started.
Note: This method is not the only way to run your application on Emulator. We will discuss another method in a later article.
Now let’s develop our application. Delete all the code in main.dart file and create flutter from scratch.
Here is the widget tree of the application.
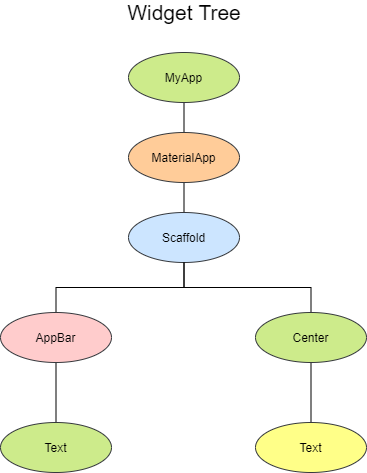
What is Widget Tree in Flutter?
The widget tree is how you create your user interface; you position widgets within each other to build simple and complex layouts. Since just about everything in the Flutter framework is a widget, and as you start nesting them, the code can become harder to follow.
Here is the dart code for the above widget tree.
import 'package:flutter/material.dart';
void main() {
runApp(const MyApp());
}
class MyApp extends StatelessWidget {
const MyApp({Key? key}) : super(key: key);
@override
Widget build(BuildContext context) {
return MaterialApp(
debugShowCheckedModeBanner: false,
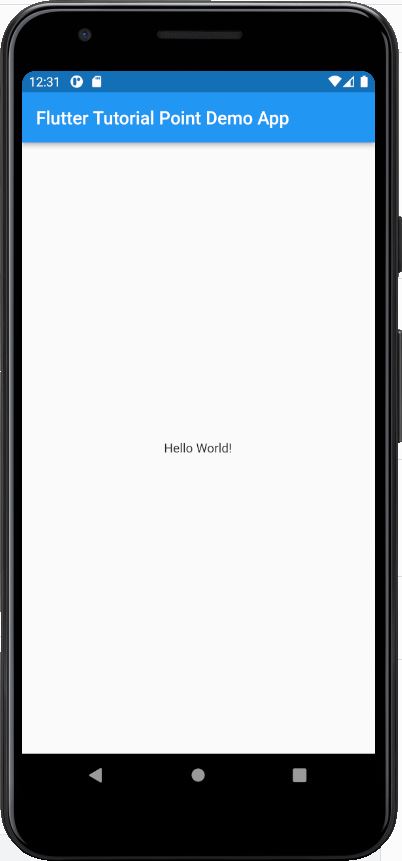
home: Scaffold(
appBar: AppBar(title: Text("Flutter Tutorial Point Demo App"),),
body: const Center(child: Text("Hello World!"),),
),
);
}
}
let’s clarify the above code.
At the top of the code, You can see the import statement. we use the import keyword to import the library/dart file.
import 'package:flutter/material.dart';In this application, we imported material.dart file for our basic application. there are a lot of other libraries in dart and we will discuss more details in another article.
void main() {
  runApp(const MyApp());
}
Flutter application start in main() function.
class MyApp extends StatelessWidget {
  const MyApp({Key? key}) : super(key: key);

  @override
  Widget build(BuildContext context) {
    return MaterialApp(
      debugShowCheckedModeBanner: false,
      home: Scaffold(
        appBar: AppBar(title: Text("Flutter Tutorial Point Demo App"),),
        body: const Center(child: Text("Hello World!"),),
      ),
    );
  }
}
Next, we created a new class called “MyApp” and it extends StatelessWidget.
In Flutter, there are two types of widgets. There are stateless widget and stateful widget.
What is StatelessWidget in Flutter?
A widget that does not require a mutable state.
A stateless widget is a widget that describes part of the user interface by building a constellation of other widgets that describe the user interface more concretely. The building process continues recursively until the description of the user interface is fully concrete (e.g., consists entirely of RenderObjectWidgets, which describe concrete RenderObjects).
What is StatefulWidget in Flutter?
A widget that has a mutable state.
State is information that (1) can be read synchronously when the widget is built and (2) might change during the lifetime of the widget. It is the responsibility of the widget implementer to ensure that the State is promptly notified when such state changes, using State.setState.
A stateful widget is a widget that describes part of the user interface by building a constellation of other widgets that describe the user interface more concretely. The building process continues recursively until the description of the user interface is fully concrete (e.g., consists entirely of RenderObjectWidgets, which describe concrete RenderObjects).
Stateful widgets are useful when the part of the user interface you are describing can change dynamically, e.g. due to having an internal clock-driven state, or depending on some system state. For compositions that depend only on the configuration information in the object itself and the BuildContext in which the widget is inflated, consider using StatelessWidget.
Under the MyApp class, return MaterialApp() widget and inside the MaterialApp there is an argument in the above code. It is called home.
under the home, there is a widget called Scaffold. In Scaffold, there are two arguments called appBar and body. In appBar has a widget called AppBar and body has a widget called Center.
Also read: What is flutter?

")
")
